|


|
Windows
XP Dialup Networking Setup
- Click on Start
- Click on Control Panel
- If in Category View, select Network and Internet Connections, then
double click Network Connections near the bottom of the window.
- If in Classic View, double click Network Connections
- You should see the following:
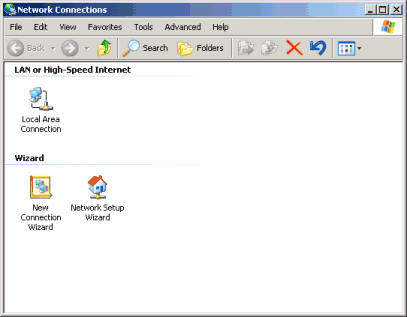
- Double click New Connection Wizard.
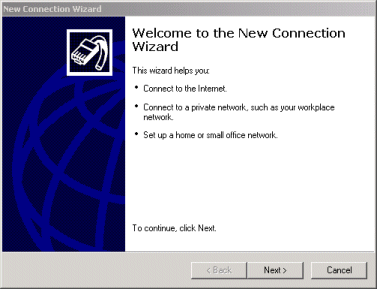
- Click Next
- Click on and select the Connect to the Internet option. Click Next.

- Click on and select the "Set up my connection manually..." option. Click Next
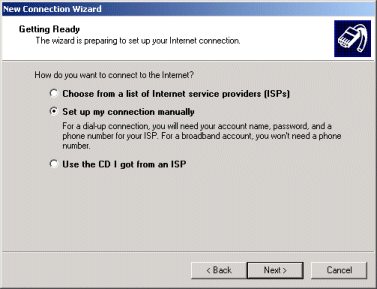
-
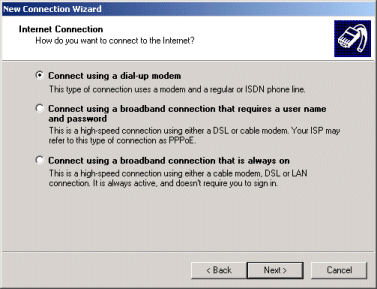
Click on and select the "Connect using a dial-up modem" option.
- Click Next.
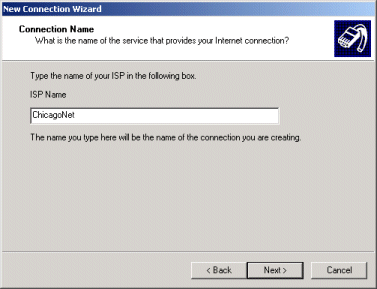
- Type ChicagoNet as the ISP name. Click Next
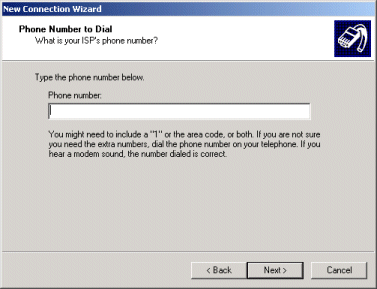
- Type the area code and phone number of a ChicagoNet dialup that is local to you. (Refer
to the dialup list
). Click Next.
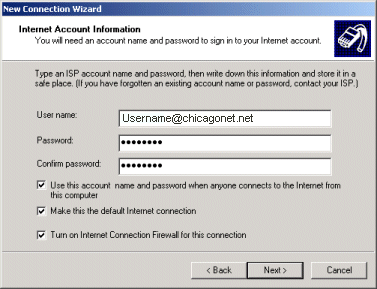
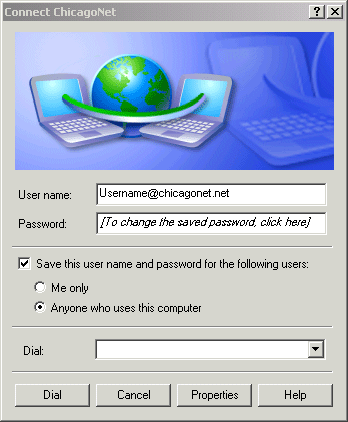
- Enter your User name and Password if you wish them to be saved for
automatic use. Be sure to enter your username as Username@chicagonet.net as shown below. Click Next.
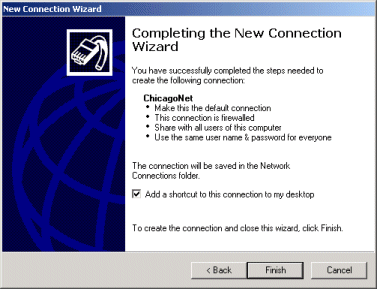
- Check the "Add a shortcut.." box to add a connection
Icon to your desktop. Click Next.
- You should now see the connection window. If you don't,
double click your connection to open this window.
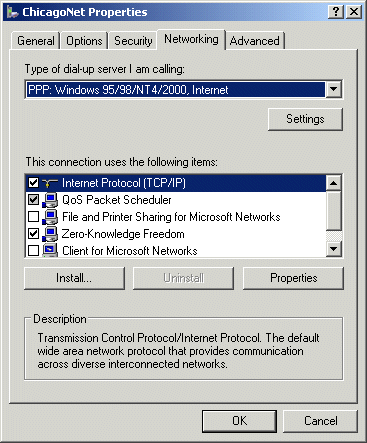
- Click Properties.
- Click the Networking Tab.
- Make sure the "Type of dial-up server..." is set to the
one pictured below.
- Click (Make sure to keep it checked) the Internet Protocol
(TCP/IP). Click Properties.
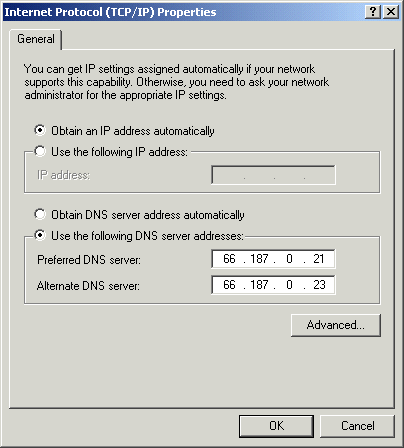
- Make sure the "Obtain an IP address automatically"
option is selected.
- Click on "Use the following DNS server address:".
- Enter 66.187.0.21 as your Preferred DNS server.
- Enter 66.187.0.23 as your Alternate DNS server.
- Click OK.
- Click OK on the properties window.
- Your setup is now complete and you may connect to the Internet at
this time.
|
Email: Webmaster@ChicagoNet.net
Revised: May 1, 2000
ChicagoNet • 780 W. Army Trail
Road• PMB 153 • Carol Stream, IL • 60188
708-656-6900 Copyright © 1995-2000 ChicagoNet All Rights Reserved Worldwide
|