|
1) In the Control Panel folder, click on the Modem icon and make sure
that you have selected your modem and set the correct options. Then, close the Modem
window.
2) In Control Panel, click on the Network icon and select the Services
tab.
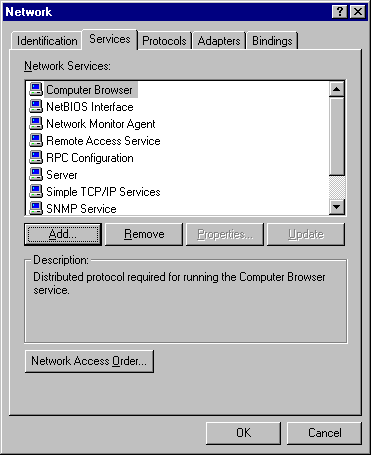
You may not see the Remote Access Service line above depending on how Windows
NT was configured on your particular PC. If RAS is listed, please press Properties
and skip ahead to Step 12 of these
instructions.
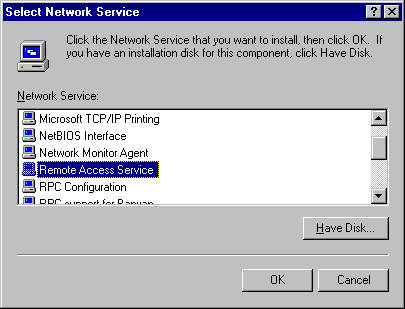
3) If you do not see Remote Access Service listed, click on Add button,
and select Microsoft and Remote Access Service. Place your Windows NT CD in
the CD-ROM drive. Finally, click OK and the system will copy over some files.
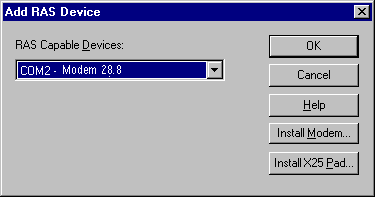
4) You will now be asked to select your modem.
5) The screen below shows that you have selected the RAS
modem that you will be using.
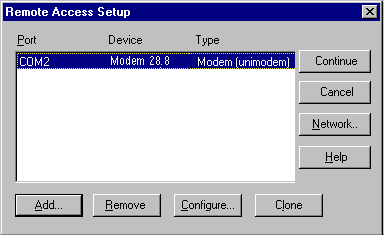
Click on the “Configure” button above.
7) Select the “Dial out only” option
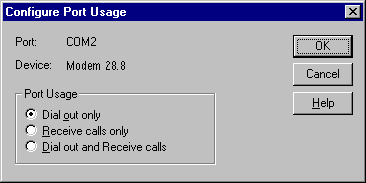
Click on OK above
8) You will now be shown the screen below
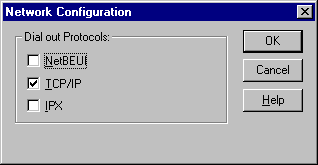
Click on “Network”
9) Select “TCP/IP” option and click on “OK”
10) You will now be displayed the screen below
Click on the “Continue” button.
11) RAS is now configured.
12) You now need to set up your “Dial up Networking”
properties.
13) Click on the “My Computer” icon and then click on the “Dial up
Networking” icon.
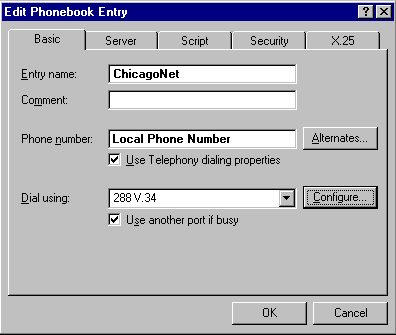
14) Click on the “New” button. Now type in ChicagoNet as shown.
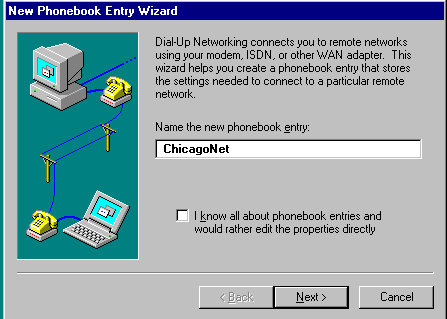
Click on the “Next” button.
15) In the screen shown below, select the options shown below.
Click on the “Next” button.
16) Enter the phone number and area code of your access number.
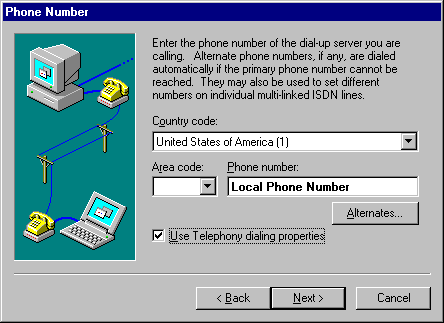
Click on the “Next” button.
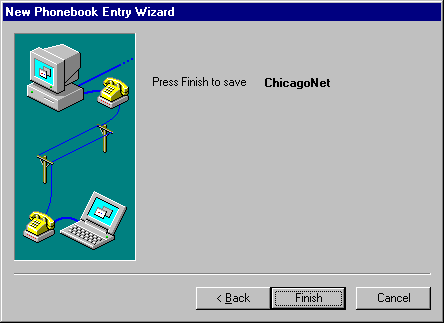
17) Click on the “Finish” button below.
18) At this point you have now set up an entry for ChicagoNet
19) Click on the “More” button and select the “Edit Modem and entry
properties” entry.
20) Click on the “Configure” button to see the screen below.
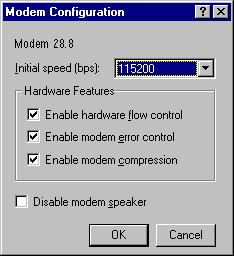
Select the options shown above and click on OK to go back to the previous screen.
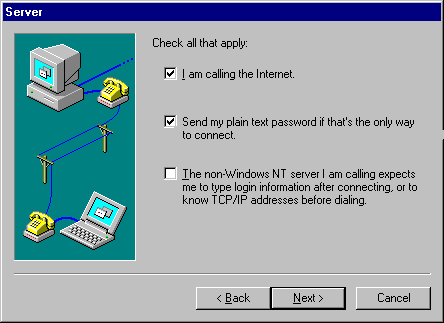
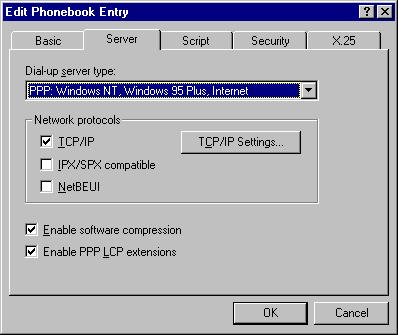
21) Then click on the “Server” tab and select the options show below.
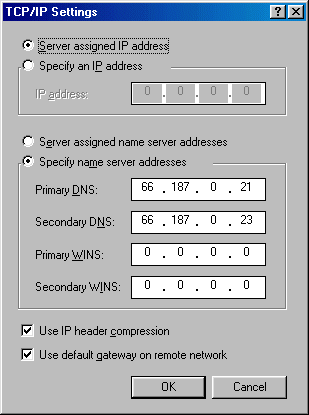
22) Click on the “TCP/IP Settings” button and select the options shown below.
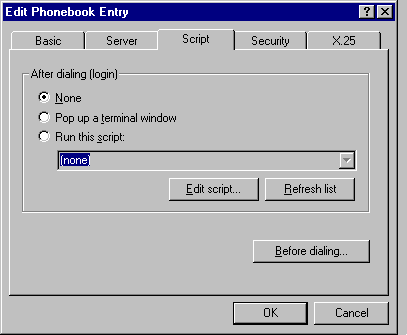
23) Select the “Script” tab and select the options shown below.
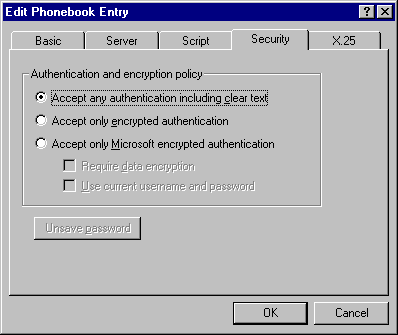
24) Click on the “Security” tab and select the options shown below.
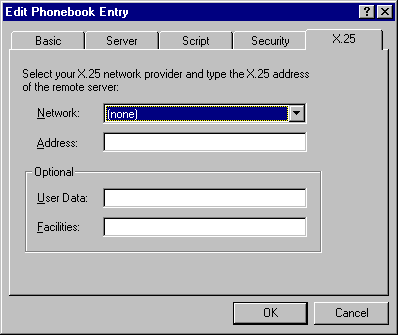
25) Click on the “X.25” tab and select the options shown below.
Click on the “OK” button. You are now done setting up dialup networking.
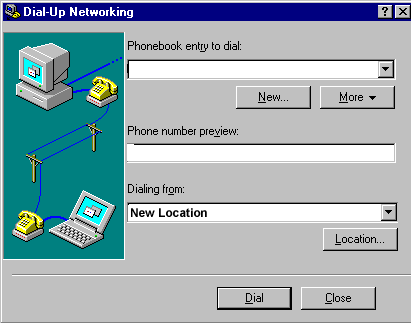
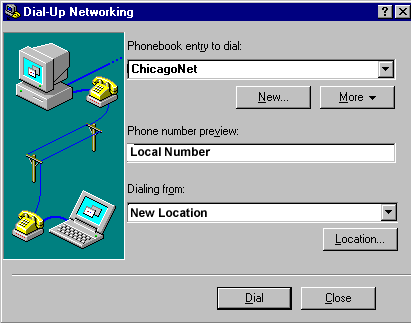
26) You will now see the screen shown below.
Click on the “Dial” button to begin the connection to ChicagoNet..
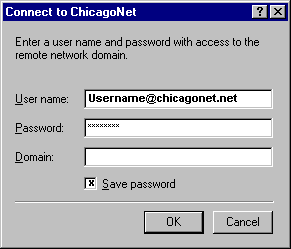
27) Enter your ChicagoNet “UserName” and “Password”. If you would
like to save the password for the next session, make sure that “Save Password”
option is selected. Make sure you enter your username as username@chicagonet.net as shown below.
28) Do Not enter anything in the “Domain” field. Leave it blank. Click on the
“OK” button. At this point your modem should begin dialing in, and you should
connect to ChicagoNet.
|